 See in Reader
en_gwt Issue 50 Changed Alpha from "T" (Title) to "LI" (Letter Indeclinable) |
||
|---|---|---|
| .github | ||
| Auto-tagged | ||
| Checked | ||
| Data | ||
| Logs | ||
| Manual_Tagging | ||
| Misc | ||
| Output | ||
| Tag_test | ||
| ULB_xml | ||
| doc_images | ||
| output_from_3 | ||
| output_from_newer | ||
| .gitattributes | ||
| .gitignore | ||
| Build_OL_files_from_XML.pl | ||
| Build_ULB_XML_for_Tagging.pl | ||
| Check_ULB.pl | ||
| Construct_auto-tagged_ULB_XML_files_from_unified_ULB_XML_and_tWs_and_OGNT.pl | ||
| Extract_Concordance.pl | ||
| Find_first_occurrence_of_proper_nouns.pl | ||
| Find_first_occurrence_of_tWs.pl | ||
| Get_Strong_variants.pl | ||
| Inventory_usfm_markers.pl | ||
| README.md | ||
| Template.md | ||
README.md
Managing git branches with SmartGit for en_ulb_tagged repository
Setup a Fork of the en_ulb_tagged repository from within Gitlab
The following setups will create a complete copy of the source repository under your user name.
- Login to the WA Gitlab server:
- Navigate to https://content.bibletranslationtools.org
- Click "Sign In" in the upper right corner
- Enter your sign in credentials.
- Navigate to the en_ulb_tagged repo: https://content.bibletranslationtools.org/WycliffeAssociates/en_ulb_tagged
- Click on the fork button in just under the "Sign In" button on the upper right:

- On the "New Repository Fork" page, click the green "Fork Repository" button to create your new fork.
Clone your new forked repository to your local computer
After the following steps, you will have a complete copy of your forked repo on your local computer.
- Navigate to your newly cloned repository in Gitlab (if it is not already open).
- Next to the blue "New File" and "Upload File" buttons select and copy the URL to clone the repo:

- Open SmartGit.
- Select Repository > Clone from the application menu.
- Paste the clone URL into the Repository URL:

- Click "Continue."
- On the following screen make sure "Include modules" and "Fetch all Heads and Tags" are both checked.
- In the next screen enter or select the folder where you want to save your cloned repo and click "Finish."
Create a new working branch from master
When working with git repositories, it is best practice to create a new working branch upon which to apply your new work. This keeps the master branch clean and makes it easier to keep your forked repository in sync with the main/source repository. If you apply all of your changes to the master branch, you could end up with conflicts with the main/source branch that must be reconciled by hand. Therefore, the following steps walk you through setting up your new working branch.
- Open SmartGit.
- Locate the pane labeled "Repositories" and make sure you have selected and activated the en_ulb_tagged repo.
- Locate the "Branches" pane and select and double click the "master" branch or right click it and select "Checkout".
- Select Branch > Add Branch from the SmartGit menu OR press F7 to open the Add Branch dialog.
- Enter a name for your new branch. Keep your branch name simple, but expressive. Also, make it lowercase. For example, "colossians-check-edits" would be a good name for working on the final edits for Colossians.
- Click "Add Branch & Checkout" to create your new branch and checkout the branch. Checking out a branch makes that branch active so that any commits you make get applied to the new branch instead of master.
NOTE: You will want to create separate branches for the various stages of your work. Doing so makes tracking your changes and organizing updates to the main repository easier. Trying to apply all of your work to one large branch can make merging work back to the main repo difficult as the work progresses.
Commit progress to your working branch
When you commit your work is entirely up to you, but it makes sense to make commits whenever there is a natural/clear transition. For instance, if you change the structure of the XML by changing the name of one of the attributes but you also need to update the translation in the tags separate the two pieces into separate commits. Make the structural changes and commit the work to your working branch. Then work on the translation issues and create another commit. That way, if we need to track down the source of a change it will be easier.
- With SmartGit open and the repository active, double click on your working branch to check it out.
- Assuming that you have already made your edits to the source files, locate your changed files in the "Files" pane.
- Highlight the file(s) you want to include in the new commit.
- With the files highlighted, right click select "Commit" from the popup context menu.
- In the opened commit dialog, select the files you want to include in this commit and add a commit message. Make sure your commit message indicates the changes you are saving.
- Click "Commit". You should now see your new commit at the top of the tree in the Graph pane.
Push your working branch to Gitlab
Now that you have a shiny new branch with some changes that are ready to be published to the main repository, you will need to push your new branch up to Gitlab.
- In the branches pane locate and highlight your current working branch.
- Right click on your branch name to bring up the popup context menu.
- Click "Push To".
- In the "Push 'my-new-branch-name' to a remote repository" dialog that opens make sure the "Target Repository" is set to "origin" and "Push To:" is set to "Tracked or matching branch".
- Click "Push".
Your changes are now on your forked repository on the Gitlab server.
Create a Pull Request
To move your changes into the main repository you must create a pull request. A pull request notifies the main repo administrators that you have new changes suggested and gives them an opportunity to review and approve your changes.
- Sign-in to Gitlab: https://content.bibletranslationtools.org
- On the landing page after you sign-in you will see a list of your activity on the left and a list of the repositories you have access to on the right. Look for /en_ulb_tagged and click ( = the your Gitlab username).
- Click the "Pull Requests" tab.

- Click the green "New Pull Request" button.

- In the newly opened form, give the PR a name and enter a description to summarize the changes you are suggesting.
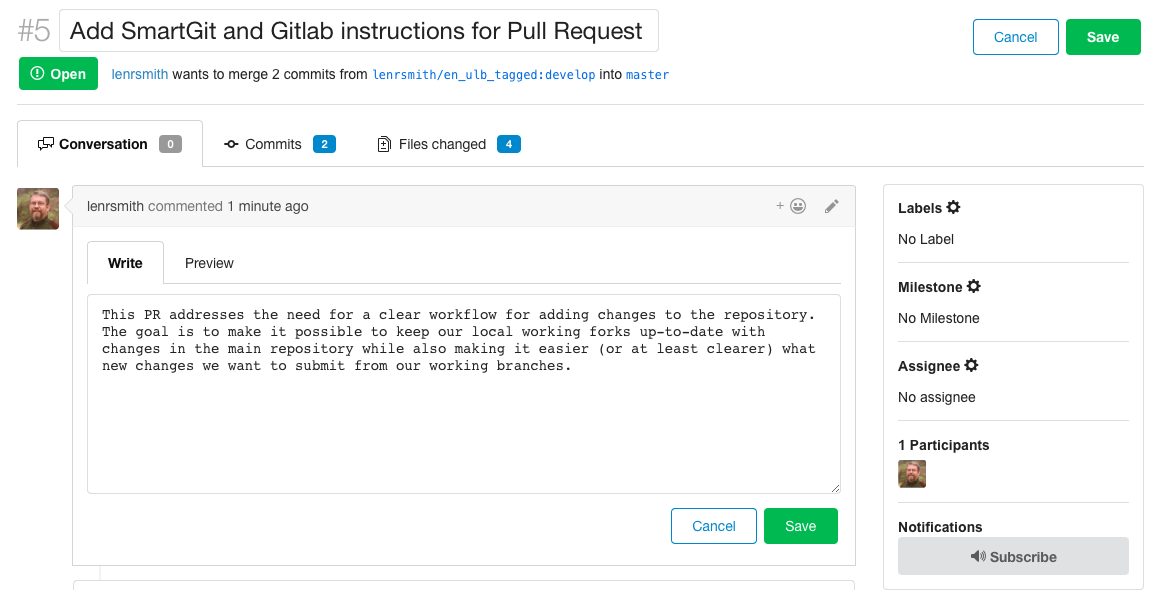
- Click "Save".
You have now created a new pull request.